Making the Doll
Drill the holes. Try to be as accurate as possible. I used power scroll saw and power sander and then sanded by hand, too. If you have better machines (CNC, laser cutter, 3D printer) you could probably make it much more accurately. The most important things to pay attention at this point is the distance of the two axle holes on the torso's side panels and that all holes are vertical. I clamped the pairs and drilled them together.
The cut out and drilled body parts. (4 mm plywood)
Spacers for the hip. (6 mm plywood. You need only 2 for one acrobat.)
Top right: spacers for the shoulders. (6 mm plywood. I also call it pulley as it serves like that for the string.)

According to one of my theories, which is not really proven yet, the pegs should hit the thighs' spacers horizontally, (or at least close to horizontal) - second picture. If the peg hits downward, as on the first drawing, the hard hit might lift the toes which is the worst thing that can happen. If the pegs hit horizontally it might just kicks the foot forward a little bit.

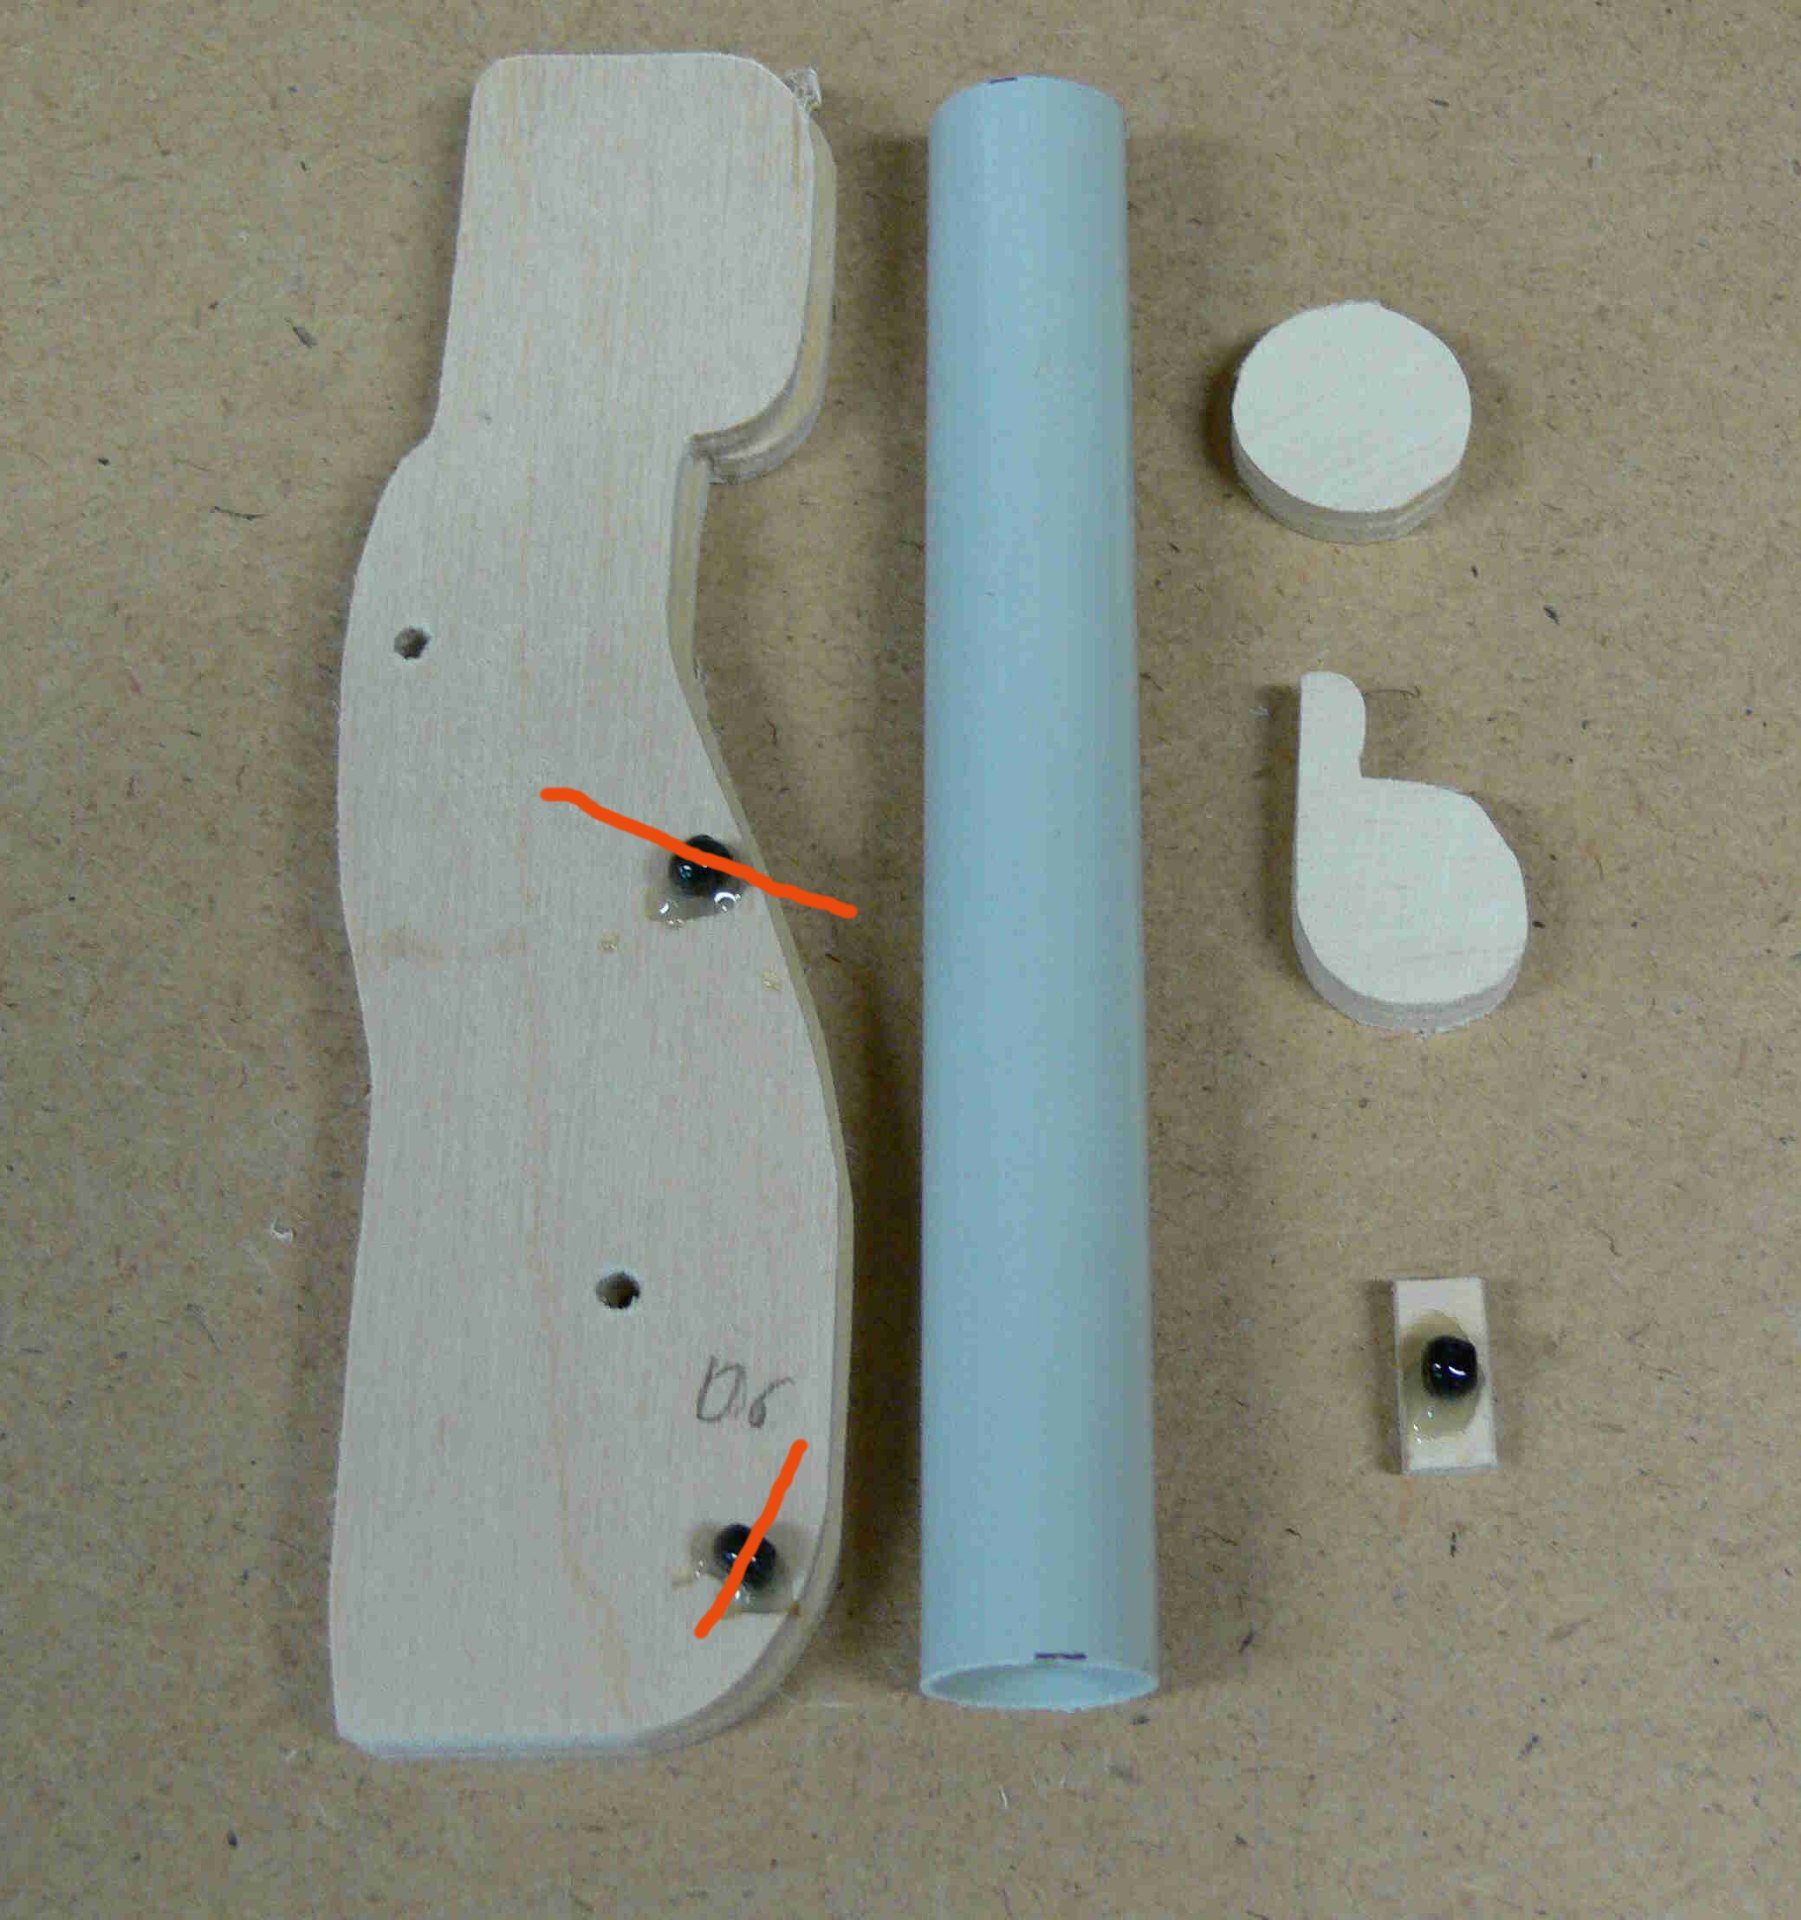
With a two part glue, I glued 2 beads (used for children's necklaces) on the torso for the string to go through. The third bead may not be necessary. One advantage is the elevation on which it is glued which helps the string to stay in place. The red lines show the direction of the holes in the beads.
These are about all the parts together.